A step-by-step guide for remotely broadcasting as a DJ from your PC.
This tutorial is by Dean Zulueta from KUSF. Check out his music on SoundCloud and Instagram.
Software
- Rocket Broadcaster – FREE – This allows you to stream from your PC.
- VB-Cable – FREE – This allows you listen to your stream and play music at the same time. (Or, if you have an additional soundcard, then this program isn’t necessary.)
- Volume Mixer – FREE (Included in Windows) – This will allow you to turn down the volume of your music if you want to play music under voice overs.
Installation: Rocket Broadcaster
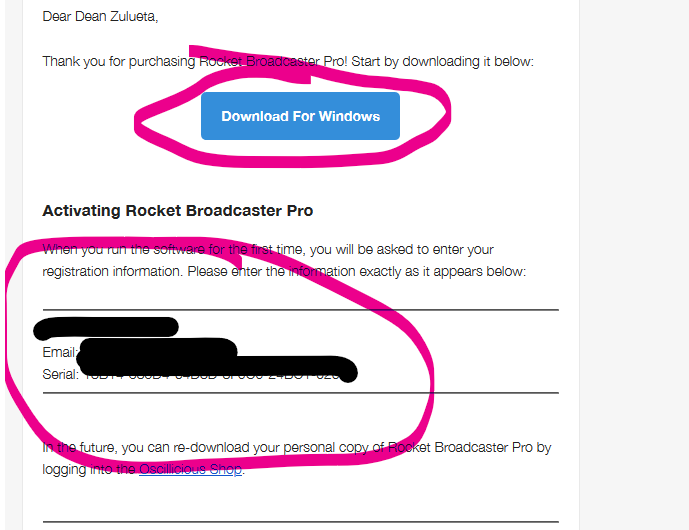
You can download Rocket Broadcaster from their website:
Once downloaded, open rocketbroadcaster_setup.exe
Follow the prompts to complete the installation. When asked to create a Desktop shortcut, click Yes.
Click Finish and uncheck Launch Rocket Broadcaster.
Installation: VB-Cable
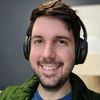
- Download VB-Cable from the link above. Be sure to click the windows version.
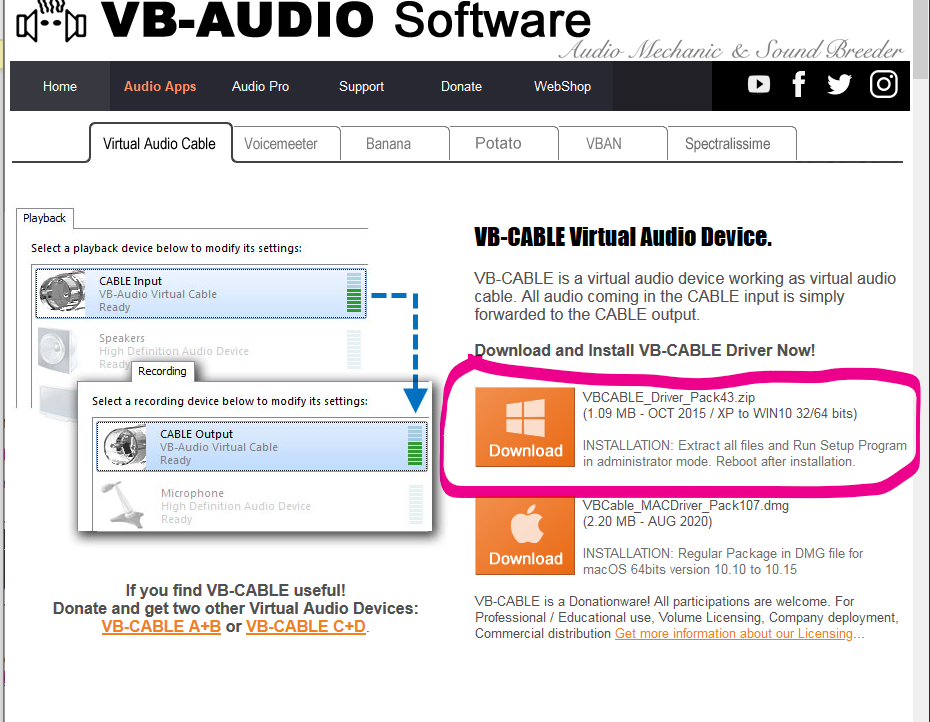
When the folder is downloaded, right click and then click Extract All…
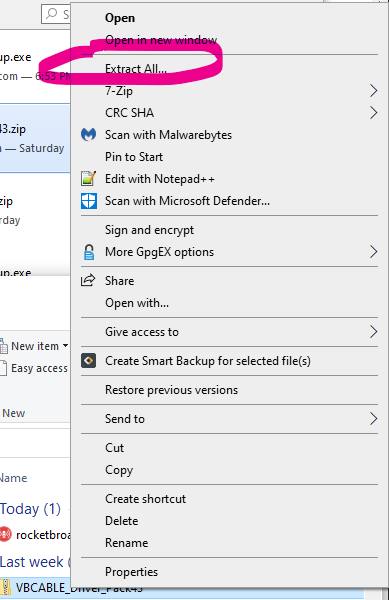
Once the extracted files are ready, find the appropriate install file. Most computers are 64-bit however if that version doesn’t work, try the 32-bit version.
32-Bit: VBCABLE_Setup.exe
64-Bit: VBCABLE_Setup_x64.exe
Right-click the appropriate file and then click Run as Administrator
Click Install Driver. Reboot after installation.
Configuration
- Go to the Start button and search for Control Panel. Open once found.
- Click Hardware and Sound.
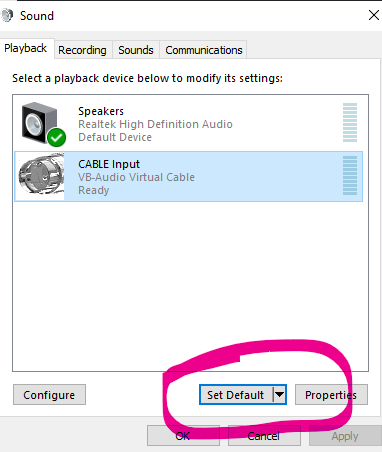
- Click Sound.
- Under the Playback tab, click CABLE Input and then click Set Default.
Under the Recording tab, set your microphone as default. Usually called Microphone Array or Microphone.

Now open Rocket Broadcaster. It will ask for the registration information found in the email with the download link.
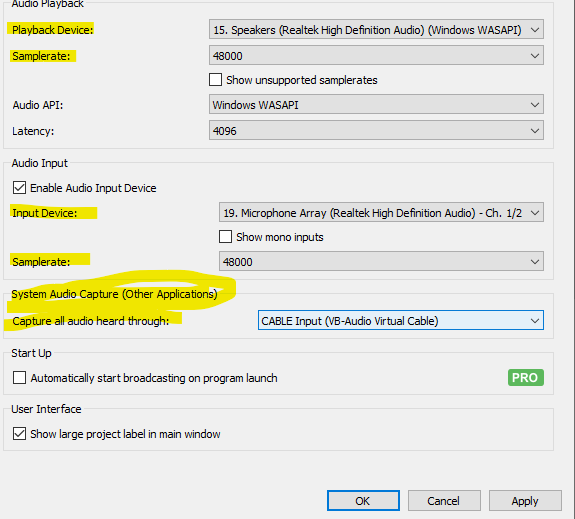
Then click Preferences. Adjust the following parameters:
- Playback Device: Laptop Speakers
- Input Device: Microphone Array (or whatever mic you are using)
- Capture all audio heard through: CABLE Input (VB-Audio Virtual Cable)
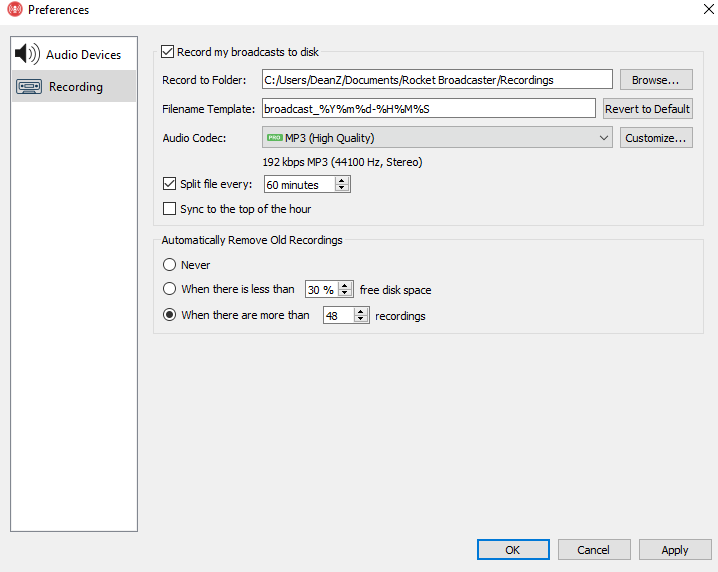
OPTIONAL: If you would like to record broadcasts, those settings are available under Preferences as well.
- Click Apply and then OK.
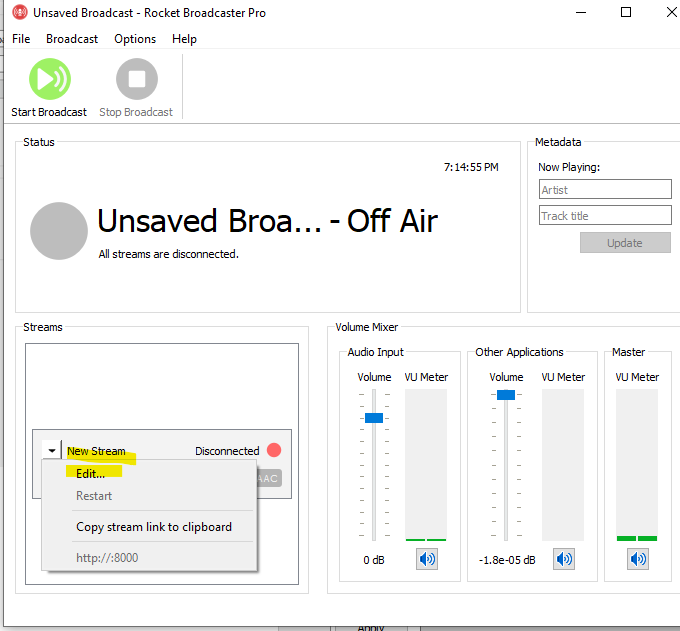
- Click New Stream and then Edit…
Change the following settings:
- Name: [Name of your Station]
- Server Type: Icecast 2
For the settings below, get them from Creek Studio, or ask your station engineer:
- Hostname or IP
- Port
- Mount
- Username
- Password
Lastly:
- Network Interface: Choose your internet connection.
Audio Codec
- Codec: MP3
- Bitrate: 256 kbps
- Channels: 2 (Stereo)
- Samplerate: 48000 Hz
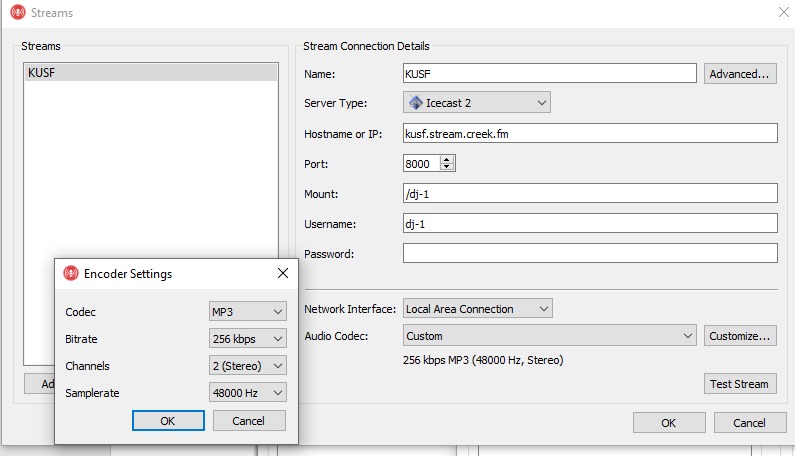
Click OK to save settings.
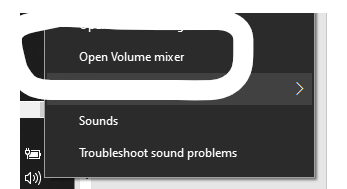
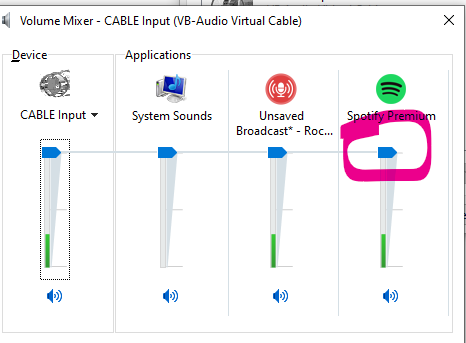
Right click the windows Speaker icon and then click Volume Mixer.
Use the volume mixer to control the volume of Spotify, SoundCloud, iTunes, etc.
Go back to Rocket Broadcaster.
Ensure you have earbuds or headphones plugged in or there might be a really loud feedback loop.
At this point, you should hear nothing coming out of your laptop speakers and the VU meter should be showing music playing. (If you haven’t, then start playing music.)
Click Options, then Monitor Master Output
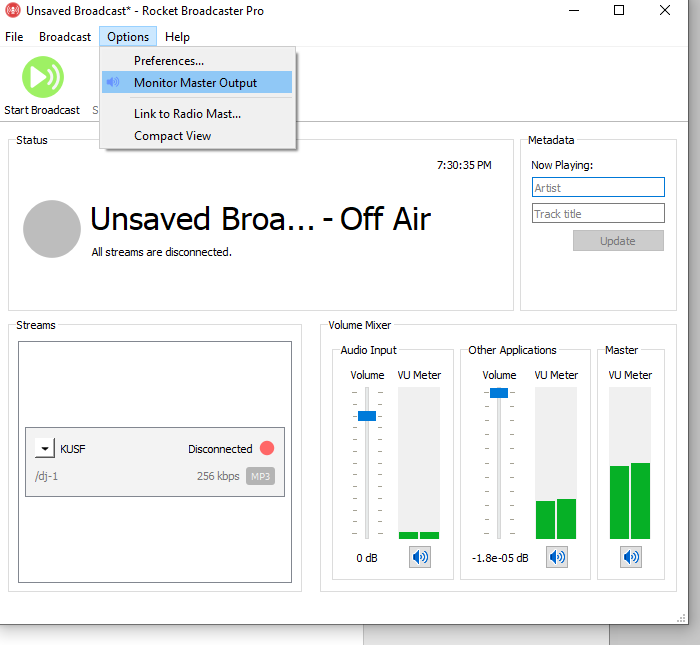
Now you can hear the stream and yourself. Be sure to mute the Audio Input channel when you are Off-Air.
To begin the broadcast, click Start Broadcast.